
How to Upgrade from Windows 7 to Windows 10?
As Microsoft has ended its support for Windows 7, upgrading to Windows 10 is strongly recommended to ensure that your computer remains secure and up-to-date with the latest features. If you’re still using Windows 7 and want to upgrade to Windows 10, you may be wondering where to start. In this guide, we will provide you with step-by-step instructions on how to upgrade from Windows 7 to Windows 10, so you can make the transition with ease.
Related Topic: How to Upgrade from Windows 10 to Windows 11?
Table of Contents
Upgrade from Windows 7 to Windows 10

To upgrade your Windows 7, you are going to follow these simple steps.
- Back up all your data
- Create Windows 10 installation media
- Upgrade this PC now
Step 1: Back up all your data
Before starting the upgrade process from Windows 7 to Windows 10, it is important to back up all of your important documents, apps, and data to ensure that you don’t lose anything during the process. This is especially important if you have a lot of important files, such as documents, photos, videos, and music, that you don’t want to lose.
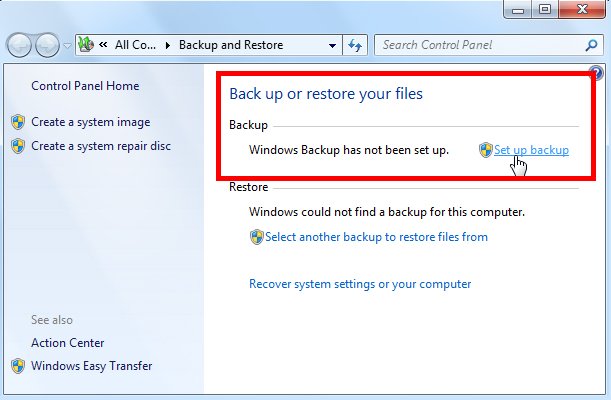
You can back up your files using an external hard drive, cloud storage, or backup software. Windows 7 has a built-in backup feature called “Backup and Restore” that you can use to create a backup of your files. To access this feature, go to the Control Panel and click on Backup and Restore.
Follow the prompts to create a backup of your files or manually copy them to an external drive or cloud storage service. Make sure to back up all important files before upgrading to Windows 10.
Once you have backed up your important files, you can proceed with the upgrade process to Windows 10 with peace of mind, knowing that your data is safe and secure.
Step 2: Download the Windows ISO file
The Windows 10 Media Creation Tool is a great way to upgrade from Windows 7. It not only allows you to download Windows 10, but it also provides you with the option to create installation media, such as a bootable USB drive or DVD.
Here are the steps to use the Media Creation Tool to download Windows 10:
- Go to the Microsoft Windows 10 download page using a web browser. Click on the Download tool now button to download the Windows 10 Media Creation Tool. Or you can use this link to use the direct link for downloading the Media Creation tool.
- Once the tool has finished downloading, run it.

- Choose the option Create installation media for another PC and click Next.
- Select the language, edition, and architecture (32-bit or 64-bit) of Windows 10 that you want to download, and click Next.
- Choose the media you want to use, such as a USB flash drive or DVD, and click Next.
- The tool will then start downloading the necessary files to create the installation media for Windows 10.
- Once the download is complete, then you will follow the on-screen instructions to create the installation media.
Step 3: Upgrade this PC now
Now that you have created a bootable USB drive using the Media Creation Tool, you can use it to upgrade your PC from Windows 7 to Windows 10. Here are the steps:
- Insert the bootable USB drive into your PC and restart your computer.
- When your PC starts up, press the key that brings up the boot menu. This key may vary depending on your PC manufacturer, but it is usually F12 or Delete.
- From the boot menu, select the USB drive as the boot device and press Enter.
- Windows 10 setup will start loading.
- Choose your language, time zone, and other preferences, and click Next.
- Click on the Install Now button to start the installation process.
- Enter your valid Windows 10 product key when prompted. If you don’t have a product key, you can skip this step for now.
- Read and accept the license terms, and click Next.
- Choose the Upgrade option to keep your files, settings, and applications.
- Click Next and wait for the installation process to complete.
- Once the installation is finished, your PC will restart, and you’ll be running Windows 10.
Related Topic: How to Upgrade Windows XP to Windows 10?
Windows 7 to Windows 10 Upgrade tool
The Windows Media Creation Tool is a free and easy-to-use tool that helps users upgrade their existing operating system, including Windows 7, to Windows 10. The tool can be downloaded for free and offers several features, including the ability to create installation media, such as a bootable USB drive or DVD, which can be used to upgrade multiple PCs.
The tool also automatically checks your PC for compatibility with Windows 10 and downloads the necessary files for the upgrade. This process makes upgrading to Windows 10 fast and hassle-free for most users.
Additionally, the tool provides users with options to keep their files, settings, and applications during the upgrade process, ensuring a seamless transition to the new operating system. Overall, the Windows 10 Media Creation Tool is an essential tool for anyone looking to upgrade from Windows 7 to Windows 10.