How to Upgrade Windows XP to Windows 10?
If you are using Windows XP and want to upgrade to Windows 10 then this is going to help you. While Windows XP is a great OS and is loved by many, still it is way too old. As a matter of fact, it has been more than a decade since Microsoft discontinued Windows XP. Using Windows 10 is a better option in terms of performance, compatibility, and security. There are tons of new features and a brand-new interface that makes it easier to choose Windows 10 over Windows XP.
Table of Contents
How to upgrade to Windows 10 from XP?

So, here is how to upgrade from Windows XP to Windows 10. We have divided the entire procedure into multiple sections, so you won’t experience any sort of problem while upgrading your Windows XP.
Check System requirement
Processor: Intel Core 2 Duo with 1 GHz process or better.
Memory: 1 GB RAM is required for 32-bit and 2 GB for 64-bit as a minimum. For smooth performance, you are compelled to have at least 4 GB of RAM memory.
Storage: 16 GB of free storage is required for a 32-bit system and 32 GB for a 64-bit. Users who want to clean install Windows 10 on their system, they are recommended to have at least 32 GB of storage.
Graphics: DirectX 9 and WDDM 1.0 is required as a minimum. You are recommended to use the latest versions of both DirectX and WDDM.
NOTE: Users who play games or tasks related to graphics, they will need additional GPU (this can vary, you will need to use one according to your usage).
Screen resolution: 800×600 screen resolution should be supported.
Use this method to check your system specs, and whether you can run Windows 10 or not. For this, you are going to open the Start menu and search for RUN. You will type “msinfor32” inside the RUN and press OK.
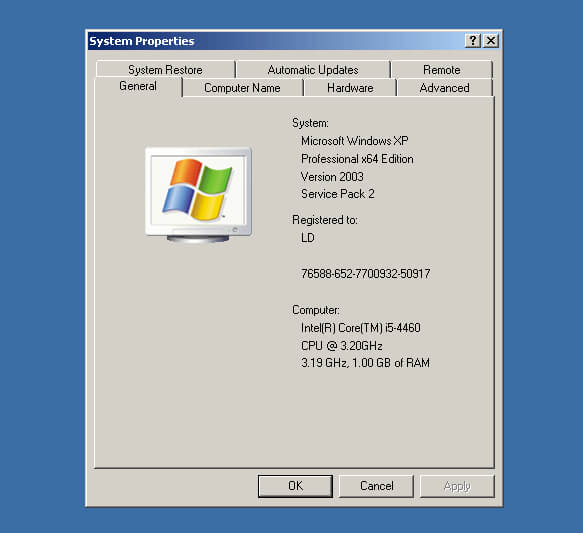
Now System Information window will appear on your screen. Navigate down to System Summary and check all your system specs. Check your specs and continue to the next step.
Backup your system
Before we continue any further, you are recommended to create a backup of your data. For this, you can use the built-in option inside Windows XP or you can use a third-party application. Third-party application as Ventoy can create backups for free.
NOTE: during the installation of Windows 10 on your system, all the data on your disk will be removed.
Users who want to use the built-in option, they will go to Start > All Programs > Accessories > System Tools > Backup. Backup or Restore Wizard, select Backup file and settings.

Now you will click on Let me choose what to back up option and then select all the boxes of folders that you want to create a backup for.
Choose the option, and select the drive you want to create a backup on.
NOTE: you are recommended to create a backup on an external drive and remove the drive once the backup is created.
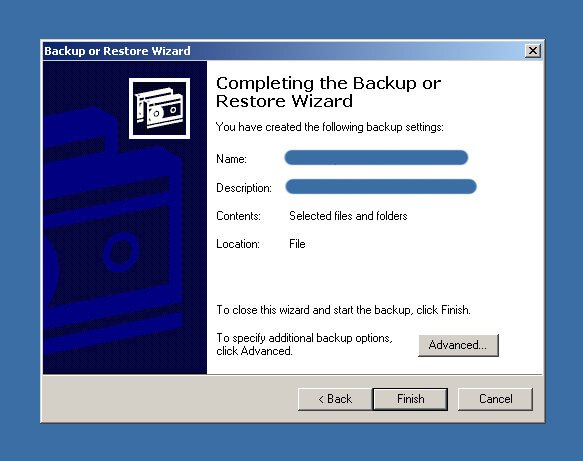
Now that you have created a full backup of your data, you will click on Finish.
Create a bootable USB
After creating a full backup, you will create a bootable USB that will be later used for installation.

You can either use this method to create a bootable USB of Windows 10. Or you will download Media Creation Tool. Media Creation tool will download the setup file of Windows 10 then will follow the instruction given by the tool and burn the ISO file on USB.
If you have already a system with Windows 10 then you can use that to create an ISO file. You won’t download any ISO file instead use your Windows to create one. We have already performed that here “Create Windows 10 ISO Image from Existing Installation files”.
If you find creating a bootable USB then you can use this “create bootable USB of Windows 10”. Once the USB is created then you will begin the installation.
Installation of Windows 10 on Windows XP
The installation of Windows 10 is divided into three different stages.
- Boot the ISO file
- Install Windows 10
- Personalize Windows 10
Boot ISO file
Press the Power button on your computer.
During the initial startup screen, press ESC, F1, F2, F8, or F10. You may also enter the BISO by pressing ESC, F1, F2, F8, or F10 (A menu could display, depending on the firm that made your version of BIOS.).
The setup utility page will show up if you decide to access BIOS Setup.
Select the BOOT option using the arrow keys on your keyboard. The available system devices will all be shown in the order of priority for booting. You can reorder the devices here. Make USB the first priority.
Save the change and then exit the BIOS Setup.
The computer will restart using the new settings, booting from your USB drive. Watch out! Your BIOS may provide you with the instruction to press any key to boot. Press any key from your keyboard to boot the setup file and begin the installation.
Install/Upgrade to Windows 10
Now you will be in Windows Setup. Select Language, Time & Currency, and Keyboard method then click on Next.
Continue the installation by following the instructions given by Windows 10.
In the “Which type of installation do you want?” window, you will select the Custom: Install Windows only (advanced) option. As you can’t directly upgrade from Windows XP to Windows 10.
Format the disk and begin the installation.
Personalize Windows 10
Once the installation got completed then your system will restart. On the restart, you will check all the options according to you. Check things as;

- Region
- Keyboard layout
- Second keyboard layout
- Sign in to your Microsoft account
- Create a password
- Create PIN
- Back up files with OneDrive
- Privacy Settings
Can I upgrade to Windows 10 from XP?
There is no option to upgrade your Windows XP to Windows 10 directly. The only option a user has to update their system to Windows 10 from Windows XP is to perform a clean installation of Windows 10. Delete all the files inside the hard disk and then perform a clean installation of Windows 10.