
How to Download Windows 11 Pro on USB?
If you want to download Windows 11 Pro on your USB directly then this will help you. Instead of downloading the ISO file of Windows 11 first and then making a bootable USB; you can download it directly.
Here we are going to mention a few methods that you can use to download Windows 11 Pro on USB. This is the safest and most reliable way to download any Windows version.
The methods are so good, you can use them without any issue and across all Windows versions.
Table of Contents
Download Windows 11 Pro on USB

For performing the task, you are going to need a USB drive of 16 GB storage with a stable internet connection. Remember the faster your internet connection is, the quicker you will download the Windows 11 Pro. Now let’s, begin the process.
Before you start, ensure that your computer meets the system requirements for Windows 11. This includes things like processor, RAM, storage capacity, and enable TPM 2.0 with a secure boot option.
Method 1: Download with Media Creation Tool
This is the most basic and common way to download Windows 11 Pro on USB.
NOTE: Before making any major changes, it’s always a good idea to back up your important data.
Step 1: Download Media Creation Tool
You are going to download the Media Creation tool first. You can use the direct links or visit the official site by Microsoft.
On the Microsoft page, find the Download Now button for the Media Creation Tool. Download the tool on your PC.
Step 2: Run the Media Creation Tool
After downloading the Media Creation Tool on your PC, you are going to run it. Double-click the file to run it. If prompted, give permission for the tool by selecting Yes.
Step 3: Accept License Terms
Now read and accept the License Terms by clicking Accept.
Step 4: Choose Installation Options
On the next screen, select Create installation media for another PC and click Next.
Step 5: Select Language, Edition, and Architecture
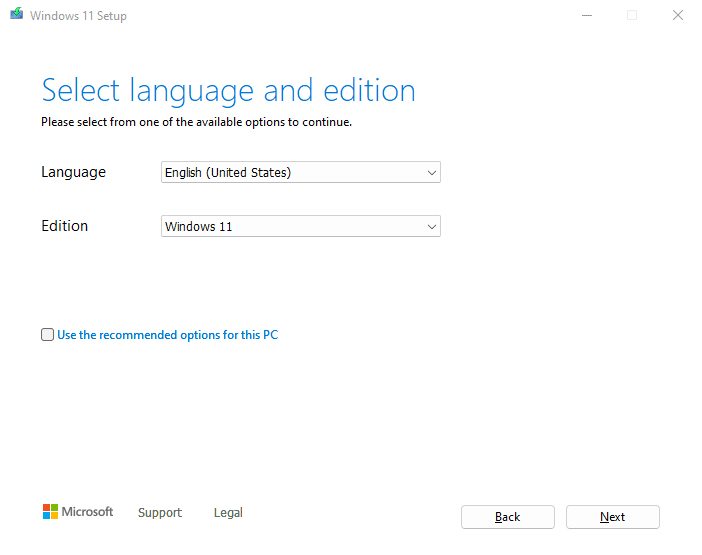
Now we are going to select our Windows and all details related.
First, uncheck the box that says Use the recommended settings for this PC.
Then select the appropriate language, edition (in this case, Windows 11 Pro), and architecture (usually 64-bit for modern systems).
Click Next.
Step 6: Choose Media Type
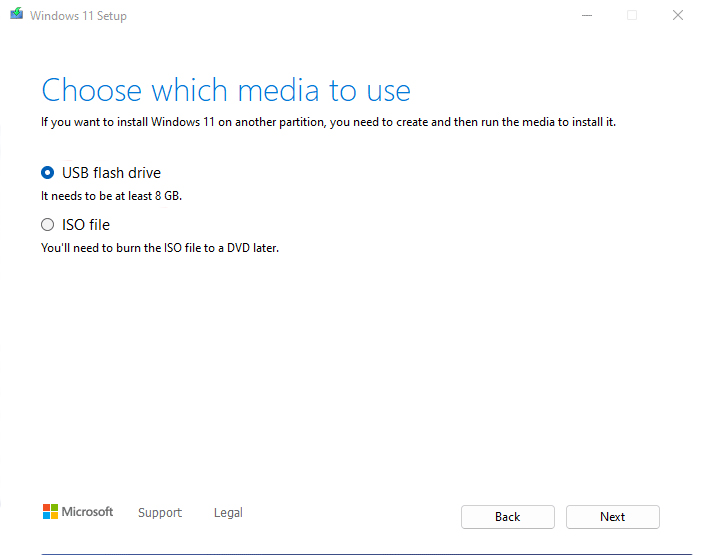
Select USB flash drive and click Next.
Step 7: Connect Your USB Drive
Connect a USB drive with at least 16 GB of free space to your computer.
Make sure there’s no important data on the USB drive, as it will be formatted during this process.
Step 8: Select Your USB Drive
In the Media Creation Tool, select the USB drive you just connected and click on Next.
Step 9: Download Windows 11 Pro on USB
The Media Creation Tool will now download the setup file of Windows 11 Pro and then create a bootable USB drive. This may take some time depending on your internet speed.
Here you are recommended to have a coffee break as downloading and creating a bootable USB will take at least 15-30 minutes.
Step 10: Complete the Process
Once the process is complete, you will see a message saying “Your USB flash drive is ready“.
Step 11: Eject the USB Drive
Safely eject the USB drive from your computer. And now, you have a bootable USB drive to install Windows 11 on your computer:
- Insert the USB drive into the computer where you want to install Windows 11 Pro.
- Boot from the USB drive. This usually involves pressing a key (like F2, F12, ESC, or DEL) during startup to access the boot menu, and then selecting the USB drive as the boot device.
- Follow the on-screen instructions to complete the installation process.
Related Topic: Free Download Windows 11 Compatibility Tool
Method 2: Download within Rufus Application
The second method is to download the setup file of Windows 11 Pro and make it bootable on USB using Rufus. Rufus is a free open-source application that has the option to download the setup file of Windows OS from a Microsoft server.
We are going to use Rufus and download Windows OS within the app. While the setup downloads, we will make it bootable too.
Step 1: Download Rufus
You can download Rufus from direct links or go to the official Rufus site.
Find the Download section and click on Rufus-4.x.exe (standard) to download. Remember that we will need Rufus 4.0 or later versions for this purpose.
Step 2: Install and Set Up Rufus
Once downloaded, run the Rufus installer by double-clicking the file. Since Rufus doesn’t require any installation, you will be directly running the app.
Step 3: Configure Rufus Settings
Click on the Settings button at the bottom of the window.
In the Settings section, select Daily from the Check For Updates dropdown menu. This is necessary for enabling the ISO download feature.
Click Close and then close Rufus.
Step 4: Relaunch Rufus
Reopen Rufus to apply the settings you just configured.
Step 5: Select Your USB Drive
We are going to insert our USB drive. Ensure your USB drive is connected to your computer.
In Rufus, under the Device section, select your USB flash drive from the dropdown menu.
Step 6: Choose Windows 11 Download Option
Right under the Boot selection section, click the down arrow on the right and select Download.
Step 7: Download Windows 11 Pro on USB
Click on Download and another option will appear.
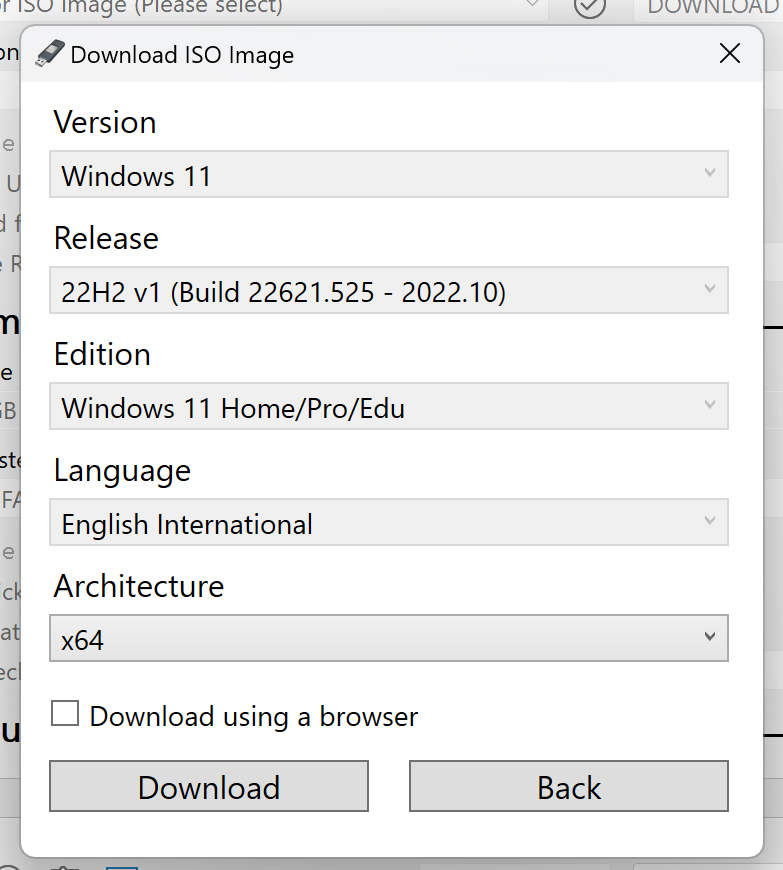
Now from the Version dropdown menu, choose Windows 11.
Click Continue.
Select the latest build (e.g., 23H2, 22H2, build 22621.1702 – 2023.05) and click on Continue.
Choose your edition (Home or Pro).
Then select your preferred language.
And again, click on Continue.
Pick the 64-bit option for architecture and click on Download.
Choose a location on your computer to save the ISO file and click Save.
Step 8: Configure Rufus for Installation
In Rufus, ensure the Image option is set to Standard Windows Installation.
Select GPT for the Partition scheme.
Choose UEFI (non-CSM) for the Target system.
Keep the default settings under Show Advanced drive properties unless you’re experienced in this area.
In the Volume label field, name your bootable media (e.g., “Windows 11”).
Don’t change the default settings for File system and Cluster size.
Step 9: Start the Process
Click Show advanced format options and ensure Quick format is checked.
Check Create extended label and icon files.
Click Start.
Step 10: Start the Process
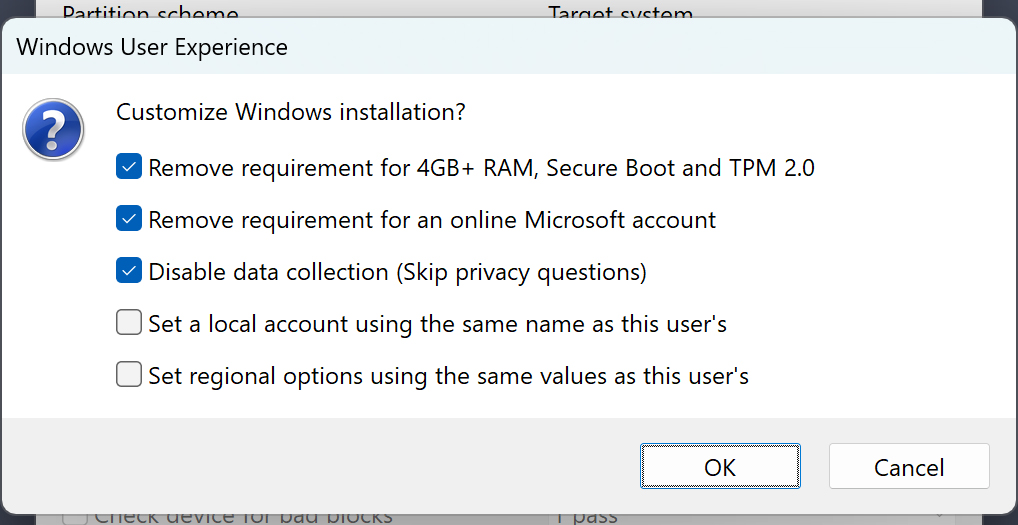
If your device has less than 4GB of RAM, lacks Secure Boot, or doesn’t have TPM 2.0, you can check the Remove requirement for 4GB+RAM, Secure Boot, and TPM 2.0 options.
Click OK to confirm the format warning.
Wait for the process to complete. Once done, click Close.
Related Topic: How to install Windows 11 without TPM and Secure Boot?
Congratulations! You’ve successfully downloaded Windows 11 Pro on a USB installer using Rufus. You can now use this USB drive to install Windows 11 on your computer. If you have any questions, feel free to ask.
Related Topic: Bypass TPM and Secure Boot in Windows 11

