Free Download Microsoft Store for Windows 11
Whether you are using Tiny Windows 11 or any regular Windows 11, if you don’t have Microsoft Store on your OS then this can help. While using Tiny Windows 11, you won’t find Microsoft Store. Same for some who are using regular Windows 11 and still can’t find it.
While the issue might occur due to many reasons; you can fix it either by reinstalling or to download Microsoft Store for Windows 11.
And here you are going to download Microsoft Store for Windows 11 and Tiny Windows 11. But first, let’s try to reinstall it.
Note: Tiny Windows 11 users should go straight to the download section. Perform tasks as given and use Microsoft Store.
Table of Contents
How to install Microsoft Store on Windows 11?
Method 1: Reinstall Microsoft Store with PowerShell
The first method will be to reinstall the Store. We have provided the required command which you are going to use on PowerShell.
The command provided is used in PowerShell to reinstall Microsoft Store for all users on the system in addition to all applications inside Microsoft Store too. However, it’s worth noting that modifying or reinstalling Windows Store apps can sometimes cause issues with the functionality of those apps.
It’s recommended to proceed with caution and consider creating a system restore point or backup before making any changes.
Okay, now open PowerShell from the Start menu. You can search “powershell” in the Start menu too.
Right-click on it and select Run as Administrator option. Paste the command below:
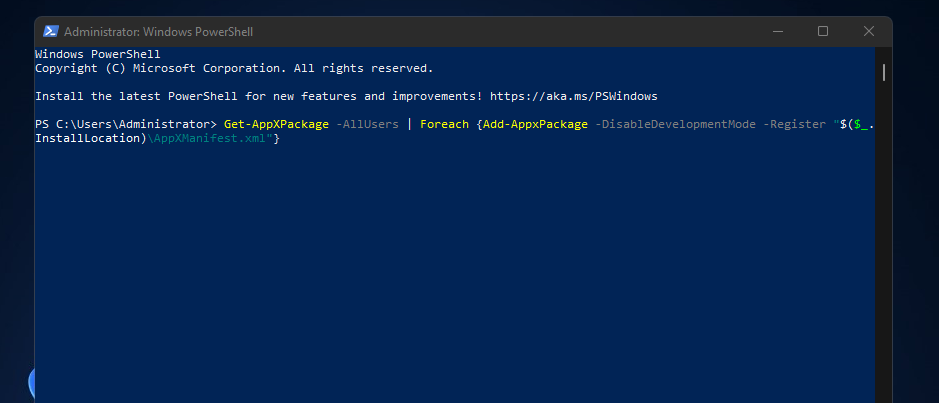
Get-AppXPackage -AllUsers | Foreach {Add-AppxPackage -DisableDevelopmentMode -Register "$($_.InstallLocation)\AppXManifest.xml"}Press Enter to use the command.
This command retrieves a list of all Windows Store apps installed for all users on the system using `Get-AppXPackage -AllUsers`. Then, it uses a `ForEach` loop to iterate through each app and reinstall it using `Add-AppxPackage` with the `-DisableDevelopmentMode` and `-Register` parameters.
Please keep in mind that running this command may take some time, and it’s important to ensure you have the necessary permissions to execute it. Additionally, make sure to copy the command exactly as provided, including any quotation marks, to avoid syntax errors.
NOTE: if you encountered any sort of issues after or before the command given on PowerShell then you are recommended to apply the next method given. As this method will fix all sorts of Microsoft Store issues.
Method 2: Download Microsoft Store using Installer Packages
No matter whether you want to download Microsoft Store for Windows 11 as you have no Microsoft Store. Or your Microsoft Store is corrupted. We will use “Appx packages” for installing a totally new Store on Windows 11.
Step 1: Visit Store RG AdGuard

The first step will be to visit Store.rg.adguard.net. This is an official online link generator to download Microsoft Store applications. Here we are going to download all the necessary installers.
Step 2: Find the Installers

Now you are going to click on the search bar and paste this “https://www.microsoft.com/en-us/p/microsoft-store/9wzdncrfjbmp” link. This link will be used to find all the installers required.

After pasting the URL, you will click on the drop-down menu and select the Retail option. Now click on the Tick icon.
Step 3: Download Installers and bundles
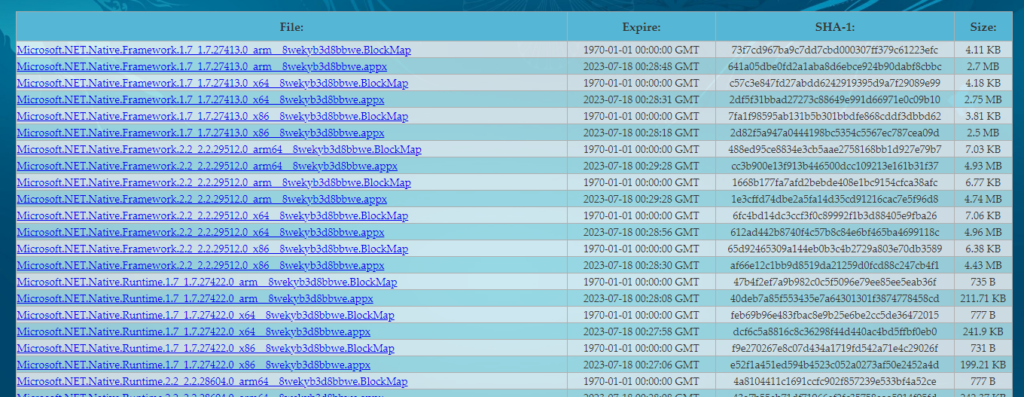
In the next window, you will find a list of different installers and bundles. You are going to find the following;

- Microsoft.NET.Native.Framework.2.2_2.2.29512.0_x64__8wekyb3d8bbwe.appx
- Microsoft.NET.Native.Runtime.2.2_2.2.28604.0_x64__8wekyb3d8bbwe.appx
- Microsoft.VCLibs.140.00_14.0.30704.0_x64__8wekyb3d8bbwe.appx
- Microsoft.WindowsStore_12107.1001.15.0_neutral_~_8wekyb3d8bbwe.appxbundle
Once found then you are going to download them one by one.
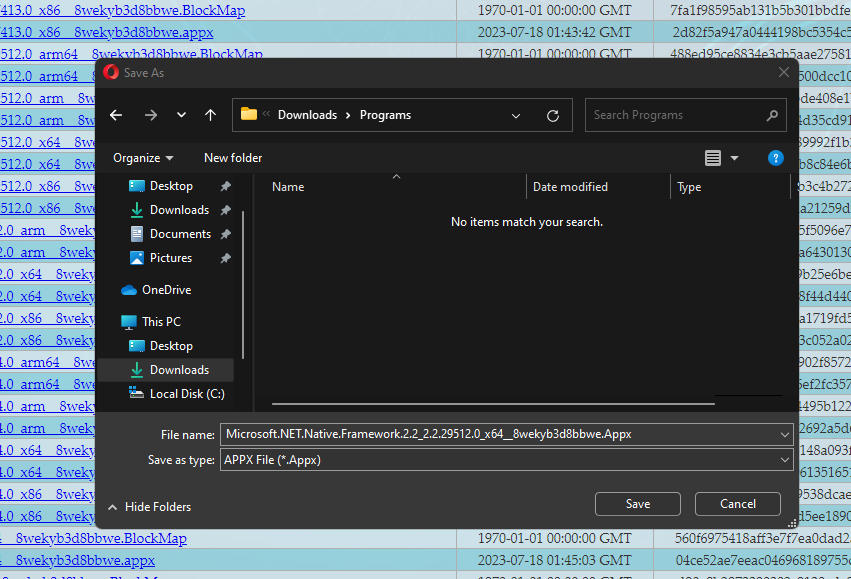
NOTE: Don’t forget to use the “.appx” extension for each one of them. All should be “.appx” except “WindowsStore” which should have a “.appxbundle” extension.
By default, you can change their extension. For changing the extensions, you are going to right-click on the download button and select Save as. Keep names as default, just change the extension.
Step 4: Remove old packages
Now you will open PowerShell as administrator. Then you will use the command below on PowerShell:
Get-AppxPackage *windowsstore* | Remove-AppxPackageLoading will take place and all the packages installed before will be removed.
Step 5: Install new packages
Now you are going to install new packages on your Windows 11. After the command above, you will use this command for installing new packages. Use the command given for each installer:
Add-AppxPackage -Path "x:\Path\filename.appx"NOTE: you are going to replace “x:\Path\filename.appx” from the command above and use the location of each installer inside your command.
To find and use the location of the installer, here is what you are going to do. Find the downloaded installers on your PC.
Right-click on the installer and select Copy as path option.
Now go to PowerShell and paste the location using right click option or CTRL+V. Then press Enter.
Apply this method, one by one for all of the installers and do the bundle at the last.
Give your system a restart once all of them are installed.
Related Topic: Fix Microsoft Store/Windows Update Error 0x80040154
Related Topic: How to Fix Microsoft Store Error 0x800704cf?
Related Topic: WSA (Windows Subsystem for Android) on Windows 11
Related Topic: How to Install WSL (Windows Subsystem for Linux) on Windows 11
