Fix WMI Provider Host High CPU: The Ultimate Guide

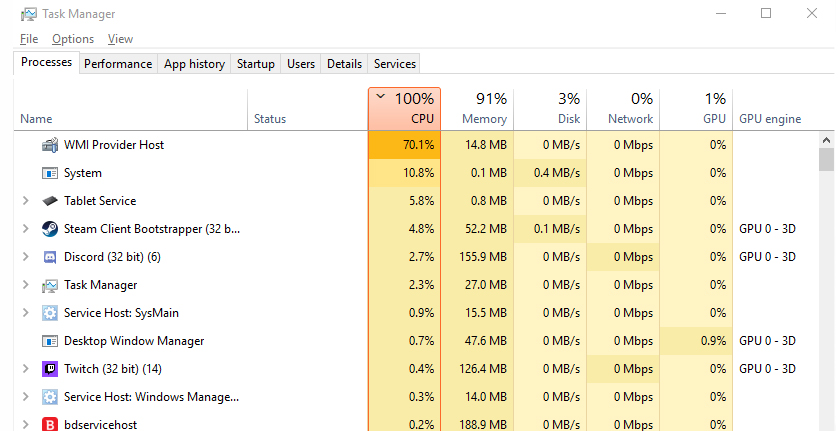
Let me guess. You were cruising along on your Windows, minding your own business, when suddenly your fan kicks into high gear. You open Task Manager… and boom — there’s something called WMI Provider Host hogging your CPU like it owns the place.
You’re thinking: “What even is this thing? And more importantly, how do I fix it?”
Good news — you’re in the right place.
In this guide, I’m going to walk you through exactly how to fix the “WMI Provider Host High CPU” issue step-by-step. And I’ll do it in plain English, with zero fluff. So, let’s dive in.
Table of Contents
What is WMI Provider Host Anyway?

Before we fix it, you need to know what it is.
WMI Provider Host (aka “WmiPrvSE.exe”) is short for Windows Management Instrumentation Provider Service. In simple terms, it’s a core Windows service that lets applications on your computer request info about your system.
Need a real-world example? If you’ve ever opened a system monitoring app like HWMonitor or used PowerShell to grab system info — that’s WMI doing its thing in the background.
Usually, it runs silently and barely uses any CPU. But when something goes wrong… it goes really wrong.
Let’s fix that.
Step 1: Restart the WMI Service
Sometimes WMI just needs a kick to get back in line. Start the operation by simply restarting WMI Service.
Here’s how to restart it:
1. Press Win+R, type “services.msc”, and hit Enter.
2. Scroll down and find Windows Management Instrumentation.
3. Right-click it, then select Restart.
That’s it. Check your Task Manager. Is the CPU usage dropping? If yes — congrats! You just solved it the easy way.
Still high? No worries. Keep going.
Step 2: Find the Process Causing the Problem
WMI is like a middleman. It doesn’t usually cause the issue — something else is triggering it.
Let’s track down the culprit.
Use Event Viewer:
1. Press Win+X and select Event Viewer.
2. Go to Applications and Services Logs > Microsoft > Windows > WMI-Activity > Operational.
3. Look for Error messages.
4. Click the error and look for something like “ClientProcessId”.
Found the Process ID? Great. Now do this:
1. Open Task Manager.
2. Click on the Details tab.
3. Match the PID to the process name.
Boom — that’s the misbehaving app. You can now uninstall it, update it, or disable it depending on what it is.
Step 3: Run a Malware Scan
Sometimes the issue isn’t a broken app — it’s something shady.
Yep. Malware can disguise itself as `WmiPrvSE.exe` and spike your CPU.
Run a full scan with:
- Windows Defender (it’s solid)
- Malwarebytes (even better)
- Or any trusted antivirus
Quarantine or remove any threats and reboot. This alone fixes the problem for a ton of users.
Step 4: Boot in Safe Mode + Clean Boot
This is your nuclear diagnostic tool.
Boot into Safe Mode:
1. Press Win+R, type “msconfig”, and hit Enter.
2. Go to the Boot tab.
3. Check Safe boot, then restart.
If WMI CPU usage is normal in Safe Mode, the problem is definitely a third-party service or app.
Now do a Clean Boot:
1. Go back to “msconfig”, but this time under the Services tab.
2. Check Hide all Microsoft services.
3. Click Disable all.
4. Restart your PC.
Turn services back on one by one to find the culprit.
Step 5: Use DISM and SFC Tools
System files could be corrupted, and that messes with WMI too. By running SFC or DISM, you can fix these issues.
Run DISM first:
DISM /Online /Cleanup-Image /RestoreHealthThen run SFC:
sfc /scannowThese tools repair corrupted files that might be causing the CPU spike.
Step 6: Disable Problematic Services or Drivers
Still seeing the issue?
Time to go deeper.
Some driver or service might be calling WMI endlessly. Tools like Autoruns (by Microsoft Sysinternals) help you find what’s loading on startup.
Use Autoruns:
1. Download it from Microsoft’s website.
2. Uncheck any suspicious third-party services or drivers.
3. Reboot and test.
Be careful here. Don’t disable anything critical unless you’re sure.
Bonus Tip: Update Windows and Drivers
Yeah, I know — “update everything” sounds cliché. But Microsoft pushes patches for WMI bugs.
Do this:
Open Settings > Windows Update > Check for updates
Go to your device manufacturer’s website and update chipset, graphics, and BIOS drivers
An outdated driver calling on WMI incorrectly can spike CPU usage. Updating clears out those bugs.
Advanced Fix: Rebuild WMI Repository
This is for the brave. If everything else fails, rebuild the WMI repository.
Here’s how:
1. Open Command Prompt (Admin)
2. Type:
winmgmt /resetrepositoryReboot your system. This rebuilds the entire WMI database.
Heads up: It’s rare to need this, but it works when nothing else does.
What Causes WMI Provider Host High CPU in the First Place?
So you’ve fixed it. But why did it happen?
Faulty Drivers – especially after an update
Monitoring Software – like antivirus, or even hardware monitors
Malware – sneaky background processes
Corrupted System Files – that confuse WMI
Overloaded Services – constantly querying WMI
Understanding the “why” helps you prevent it from happening again.
The WMI Provider Host High CPU problem is annoying — no question about it. But as you’ve seen, it’s totally fixable. With the steps in this guide, you’ve got the toolkit to squash the problem permanently.
Let’s recap:
- Restart WMI
- Use Event Viewer to track the bad actor
- Run malware scans
- Try Safe Mode and Clean Boot
- Repair system files
- Rebuild WMI if all else fails
So if your PC was wheezing and running hot before… it’s probably chilling now.
Have questions? Drop a comment below. And if you found this helpful, share it with someone else battling the WMI beast.
Till next time — stay optimized.

