Troubleshooting: USB Ports Stopped Working on Windows 10
USB ports are an essential part of any computer system. They provide a convenient and efficient way to connect external devices such as keyboards, mice, printers, and other peripherals. However, sometimes, users may encounter issues where their USB ports suddenly stop working, leaving them in a difficult situation. This problem is particularly common in Windows 10 systems and can have a range of causes.
If you’re experiencing this issue, you’re not alone. Many users have reported similar problems with their USB ports on Windows 10, and it can be frustrating to deal with. Not only does it make it impossible to use your external devices, but it can also hinder your productivity.
One of the most common causes of USB port failure on Windows 10 is a driver issue. Your computer’s USB drivers can become corrupted or outdated, leading to malfunctioning ports. This can happen due to various reasons, such as installing a new operating system, an update gone wrong, or other software conflicts.
Another reason for USB port failure could be a hardware problem. This could be due to a malfunctioning USB port or an issue with the motherboard. Sometimes, the USB ports may stop working due to a power issue or a short circuit.
Regardless of the cause, it’s essential to troubleshoot and fix the problem as soon as possible. There are several ways to diagnose and resolve USB port issues on Windows 10. However, before you try any of the fixes, it’s important to understand the underlying cause of the problem.
Here we’ll explore the various causes of USB port failure on Windows 10 and provide solutions to fix USB ports not working on Windows 10. We’ll also look at some common symptoms of USB port failure and provide some troubleshooting steps you can take to get your ports working again.
We have divided it into two sections. First, we are going to check for any kind of physical damage which is the most common reason for your USB ports not working. If there is no issue physically then we will check for system files and troubleshoot it.
Related Topic: Turn a Windows Laptop into a Desktop PC
Table of Contents
USB Port Stopped Working on Windows 10

If you’re struggling with USB port issues on Windows 10, this article is for you. We’ll provide you with some useful information and tips to help you get your computer’s USB ports back up and running. So, let’s dive in and find out how to fix this frustrating problem!
1- Check for broken cables
When it comes to troubleshooting USB port issues on Windows 10, one of the first things you should check is the cables.
Sometimes, a broken or damaged cable can cause the USB port to stop working. This can happen if the cable is bent, frayed, or twisted, causing the wires inside to break or short circuit.
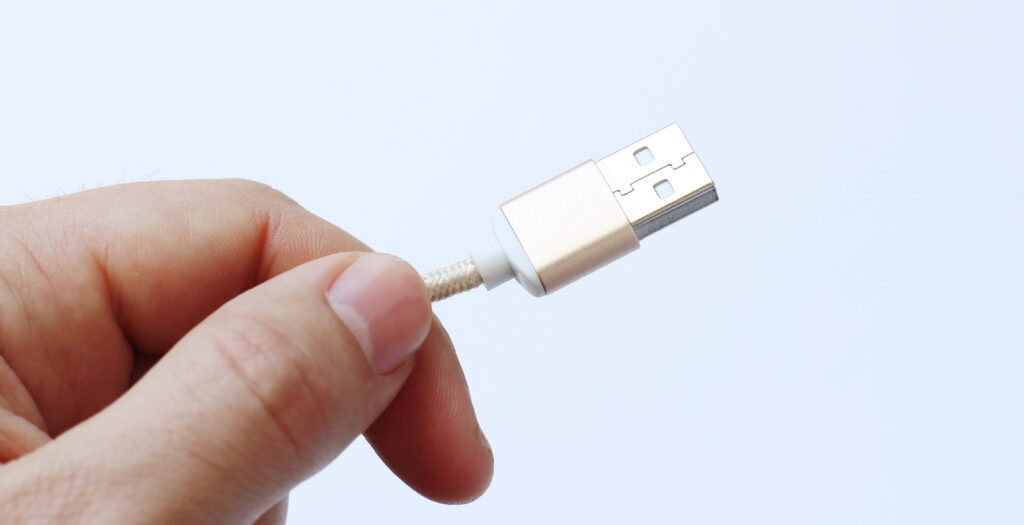
To check if your cable is the culprit, try using a different cable with the same device. If the device works with the new cable, then it’s likely that the old cable was the issue.
You should also inspect the USB port itself to make sure there are no visible signs of damage or debris inside. By checking for broken cables, you may be able to quickly resolve the issue and get your USB ports working again.
2- Check for Ports
It’s crucial to double-check that you’re using the correct USB port when you experience USB ports not working. Different USB ports have different capabilities and limitations, and using the wrong one can result in device malfunction or not functioning at all.

If you’re attempting to connect a device that requires high-speed data transfer or power supply, ensure that you’re using a USB 3.0 port. Additionally, some devices may only be compatible with specific USB port types, or you might need a USB hub for them to function correctly.
By verifying that you’re using the correct port for your device, you can ensure that your USB ports are working efficiently, eliminating any further issues.
3- Clean your USB Ports
Another common cause of the USB port not working on Windows 10 is the accumulation of dust and dirt inside the ports. Over time, dust and debris can build up inside the ports, causing connection issues and preventing devices from functioning correctly.
Not only this dust and debris can cause your USB port to stop working but will also increase system heat. Having dust on ports and other areas of your system can easily increase the temperature of your system.

To fix this problem, you can try cleaning out the ports using a can of compressed air or a small brush. Gently insert the brush or the straw of the compressed air can into the port and remove any visible dirt or debris.
NOTE: Be careful not to damage the port or any of the connectors inside. Once you’ve cleaned out the ports, try connecting your devices again and see if the issue has been resolved. By regularly cleaning out your USB ports, you can prevent future connection issues and ensure that your devices function correctly.
4- Restart and Update your Windows 10
Restarting your computer and updating your Windows operating system is an often-overlooked but effective solution for fixing USB port issues on Windows 10. Restarting your computer can clear any temporary files and processes that may be causing issues with your USB ports.
Additionally, updating your Windows OS can install any new drivers or fixes that may be needed for proper USB port functionality.
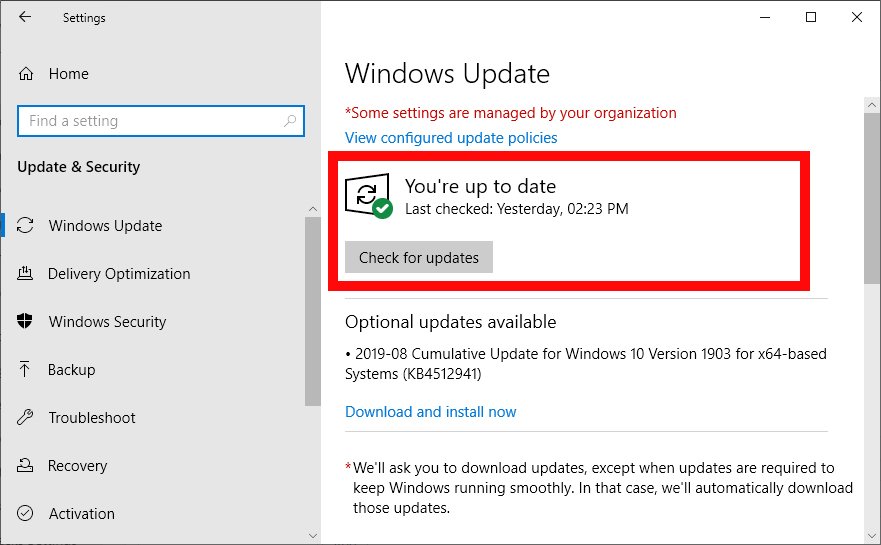
To update your Windows, go to Settings > Update & Security > Windows Update and click on the Check for updates button. Click the Download and install. And now do the installation of Windows.
This can often fix any USB port problems you may be experiencing. By regularly updating your operating system and restarting your computer, you can ensure that your USB ports work correctly and avoid any future issues.
5- Reinstall your drivers
If your USB ports have stopped working on Windows 10, it may be due to an outdated or corrupted driver. Sometimes, outdated or corrupted drivers can cause issues with your USB ports which makes them stop working. To fix this issue, you can check for any outdated or corrupted drivers, and uninstall or reinstall them.
To check drivers, go to Device Manager (Windows+X). Look for the Universal Serial Bus controllers option, and click the arrow next to it to expand the list.
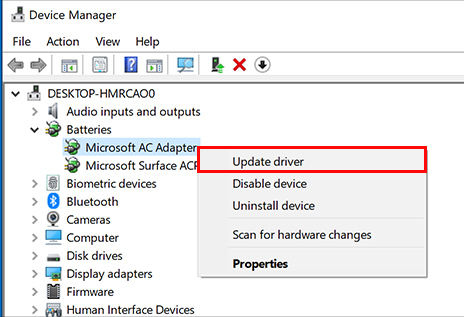
If you see any devices with a yellow exclamation mark next to them, it means that the driver needs to be updated or reinstalled.

To uninstall the driver, right-click on the device with the exclamation mark and select Uninstall device. Follow the prompts to complete the process, then restart your computer. Windows will automatically reinstall the driver when you restart.
6- Check for the Selective Suspend option
Selective Suspend is an option in the power management settings of Windows that allows you to selectively turn off power to certain USB devices. This option is mostly enabled in order to save power.
This feature is designed to conserve battery life on laptops and other mobile devices by reducing the amount of power consumed by USB peripherals when they are not actively being used.
Selective Suspend can be enabled or disabled in the power management settings of Windows. If you want to disable USB Selective Suspend on Windows 10, follow these steps:
- Open the Device Manager by right-clicking on the Start button and selecting “Device Manager“.
- Expand the “Universal Serial Bus controllers” category by clicking on the arrow next to it.
- Right-click on the first USB Root Hub device and select “Properties“.
- Click on the Power Management.
- Uncheck the box next to “Allow the computer to turn off this device to save power” and click OK.
- Repeat steps 3-5 for all USB Root Hub devices in the list.
- Restart your computer for the changes to take effect.
Disabling Selective Suspend can help ensure that USB devices are always available and responsive, but it may also reduce battery life on laptops and other mobile devices.
7- Check for new devices
Scanning for hardware changes in Device Manager can be helpful. Especially, if you have added new hardware to your system, or if you are experiencing issues with existing hardware. Scanning for new hardware changes can help ensure that all hardware components are properly detected and configured by Windows.
- Open Device Manager.
- Click on the Action menu at the top.
- Select Scan for hardware changes.
- Any new hardware detected or changes made to existing hardware will be displayed.
This is useful for detecting new hardware or resolving issues with existing hardware caused by outdated drivers or other software problems.
8- Find DisableSelectiveSuspend in Registry Editor
Additionally, the Allow the computer to turn off this device to save power check box does not appear on the Power Management tab for the USB Root Hub.
You can check for the “DisableSelectiveSuspend” value in the Windows Registry Editor by following these steps:
Press the Windows+R on your keyboard to open the Run dialog box.
Type “regedit” and press Enter to open the Registry Editor.
In the Registry Editor, navigate to the following location:
HKEY_LOCAL_MACHINE\SYSTEM\CurrentControlSet\Enum\USB\Under the USB key, you should see a list of all the USB devices that have ever been connected to your computer. Expand the tree to find the device that you want to modify.
Once you have found the device, right-click on its subkey and select Properties.
In the Properties dialog box, click on the Details.
From the Property drop-down list, select Device Instance Path.
The Value field should show the full path to the device, including the VID (Vendor ID) and PID (Product ID) values.
Close the Properties dialog box and navigate to the following location in the Registry Editor:
HKEY_LOCAL_MACHINE\SYSTEM\CurrentControlSet\Control\USBFlags\Under the USBFlags key, you may see a subkey named after the VID and PID values of the device you want to modify. If the subkey does not exist, you can create it by right-clicking on the USBFlags key, selecting New and then Key, and entering the VID and PID values as the name of the new key.
Inside the VID and PID key, create a new DWORD value called “DisableSelectiveSuspend” (without the quotes).
Double-click on the “DisableSelectiveSuspend” value and set its data to 1 to disable USB Selective Suspend for the device, or 0 to enable it.
Close the Registry Editor and restart your computer for the changes to take effect.
Note: Modifying the Windows Registry can be risky, and you should always create a backup of the registry before making any changes. Additionally, incorrect modifications to the registry can cause system instability or even prevent Windows from booting up properly.
Reset USB Ports on Windows 10
Here are the steps to reset USB ports in Windows 10:
- Open the Device Manager by typing “Device Manager” in the search bar and clicking on the result.
- Expand the Universal Serial Bus controllers category.
- Right-click on each USB Root Hub listed and select Uninstall device. This will remove the USB driver from your system.
- Once you’ve uninstalled all the USB Root Hubs, restart your computer. Windows will reinstall the USB drivers automatically.
- After the restart, the USB ports should be reset and working properly.
If you’re still having issues with your USB ports after resetting them, try updating your drivers or running a virus scan to ensure there isn’t any malware interfering with your system.
USB mouse not working on Windows 10
If your USB mouse is not working in Windows 10, here are some steps you can take to troubleshoot the issue:
- Check that the mouse is properly connected to the USB port. Try connecting it to a different port on your computer to see if that helps.
- Make sure the mouse is turned on and that the batteries (if applicable) are charged.
- Check for drivers of the USB mouse in Device Manager. Expand the Mice and other pointing devices category, and uninstall or update the driver.
- If that doesn’t work, try updating the mouse driver manually. Go to the manufacturer’s website and download the latest driver for your specific mouse model.
If you’re still having issues with the mouse, try using a different mouse to see if the problem is with the mouse itself or your computer.
If none of these steps work, it’s possible that there may be a hardware issue with your USB port or mouse. You may need to contact the manufacturer for further assistance.
Can I fix USB Port not working on Laptop?
It is possible to fix a USB port on a laptop, but the level of difficulty and feasibility of doing so will depend on the specific issue and the laptop model. It’s important to note that opening up a laptop to fix a USB port can be difficult and should only be attempted by someone with experience in laptop repairs. If you’re not comfortable doing it yourself, it’s best to take your laptop to a repair shop.