Automatically diagnose and repair Windows file and folder problems
We all have used Windows OS for quite a while. From Windows XP to Windows 11, one thing that is common is experiencing some sort of error. It can be either the sound is not working, the graphics have issues, or some features of Windows can’t be used.
While the error can be easily fixed from the built-in troubleshooter, the rest need quite some time to fix the error. Even though Microsoft is providing updates time by time for the Windows OS, still most of them require to be fixed manually.
From using CMD (to run SFC, DISM, CHKDSK) to bringing changes to registry files, that are quite a work to do. Some users prefer to use third-party applications to fix most of the Windows errors but still, they are not capable to fix all of the errors.
Bearing all these situations in mind, Microsoft has another weapon in its arsenal. Microsoft has released the Automatically diagnose and repair Windows file and folder problems troubleshooter application. This application is used to fix most of the errors and corrupt system files on your PC.
The application works like the built-in troubleshooter inside Windows 10 but this one has an advanced tool to fix all the errors. With this tool, you are able to fix most of the errors that can’t be fixed with third-party applications.
Table of Contents
Automatically diagnose and repair Windows file and folder problems
With this application (Windows file and folder diagnose app), you are able to fix the following errors given:
- It can be used to fix the issue where you are unable to run Windows Firewall.
- On occasions where the Windows Firewall is not as default then you can use it to make the Windows Firewall default.
- Users who are experiencing the Windows couldn’t start Windows Firewall (Service-specific error 5 (0x5)) can be also fixed with this tool.
- If you are having Remote Assistance connection or stability issues then this will be helpful.
- Times are there when you are unable to access shared files, printers, or media which can make things frustrating. Use the tool to fix the error within clicks.
- For those who are unable to delete files from their recycle bin or from File Explorer, this can help them.
- This is also a cure to fix those slow Windows OS.
- Can be also used for BFE service is missing.
- Is able to fix the “The file or folder does not exist” error on Windows.
- If you can’t share, copy, rename, move or delete files on a network share then this will help you. For those who are experiencing the “The network connection may be lost or the folder does not exist. The file may have been moved or deleted. Would you like to create it?” error, this is a helpful tool for them.
- Icons either removed, blanked, or changed to something that is not relatable can be also fixed.
- Users who have spent a while on Windows are known to shortcut keys. If your shortcut keys are not working (specifically the all file selection) then this tool will help you to fix it.
Related Topic: Download Windows Update Assistant for Windows 10 and Windows 11
Download File and Folder Troubleshooter

Now you will use the link below to download the tool. Since the file is directly provided by Microsoft, so you won’t need to worry about security. The file will be downloaded within a few seconds, as the file is around 2-5 MB in size.
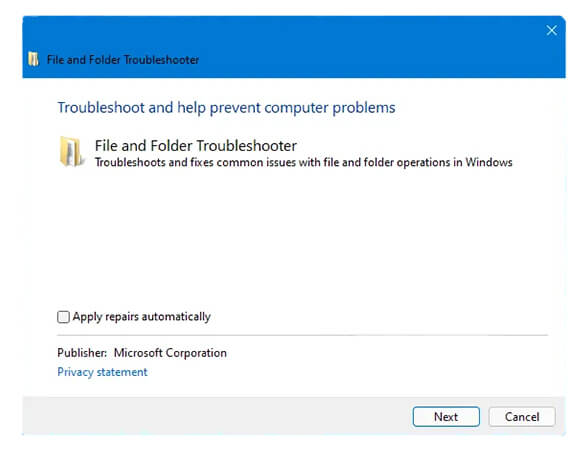
Once downloaded then you will run it. Here you will see the Apply repairs automatically option and click on Next.
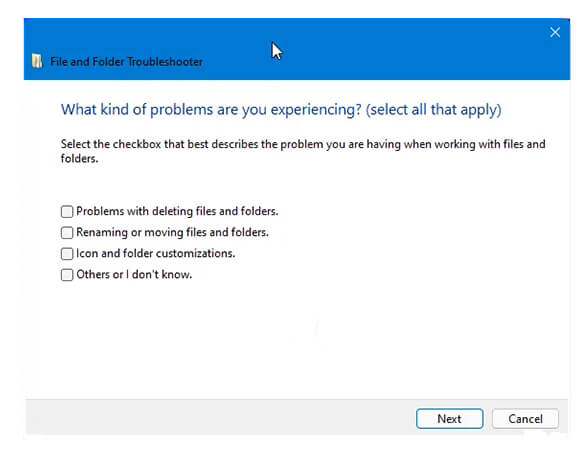
In the next window, you will select the sections where you are experiencing the error and click on Next.
You will select the option in depth and click on Next. The loading will take place and soon all the issues or errors will be fixed.
Compatibility of diagnosing and repairing Windows files and folders
Now is the time to ask things about compatibility. Like, is it compatible with my Windows OS? To answer that question, you will need to know that the diagnose and repair files and folder can be used on Windows 7 onwards.
It means that you can use it on Windows 7, Windows 8, Windows 8.1, Windows 10, and Windows 11. On some levels, the app can be also used on Windows Servers too. But it is not recommended or stated by Microsoft to use it or not on Windows Servers.
How to access the built-in troubleshooter on Windows?
There is a built-in troubleshooter that is used to perform almost the same task as the Automatically diagnose and repair Windows file and folder problems app. For this, you will navigate between the settings of Windows 10 then you will select the option.
Start the process by inserting a bootable USB of Windows 10. Now boot your USB by restarting your PC; press F11 before your system reaches the loading phase.
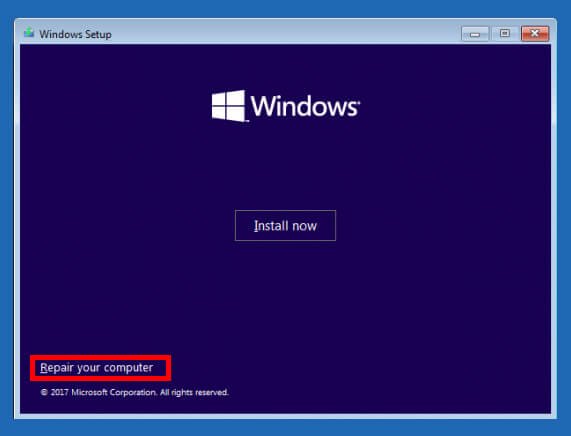
Boot your USB and start the installation phase of Windows 10. Reaching Windows Setup, you will click on Repair this instead of selecting the Install.
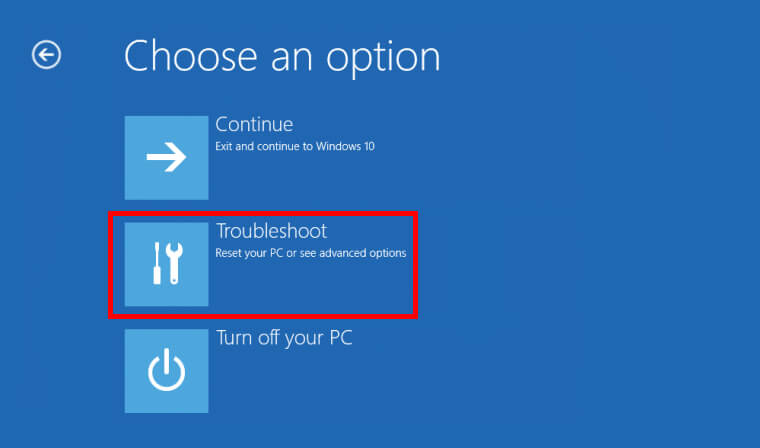
Here you have three different options. There is Continue, Troubleshoot, and Turn off your PC. You are going to select the Troubleshoot option.
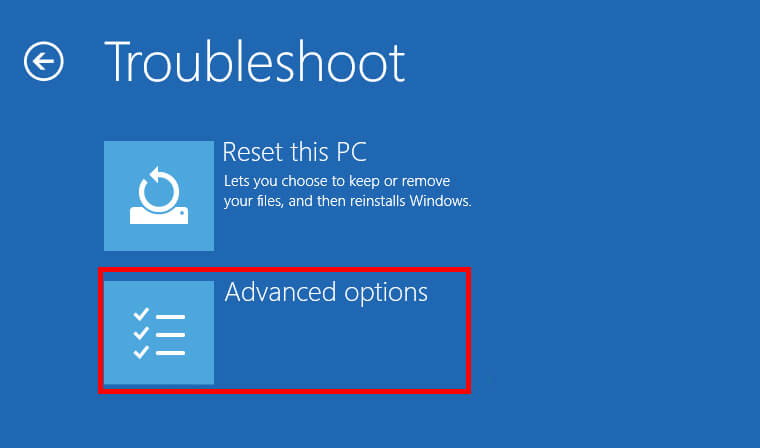
In the next phase, you will select the Advanced options.

Now you are at the Advanced options window. You are going to select the Startup Repair option to troubleshoot most of the errors on your screen.