
How to Install Kali Linux on Your Computer?
Kali Linux is one of its kind when it comes to penetration testing, hacking, and an offensive distro. As, according to the Kali team, the best security strategy is the offensive one. Here you will be guided on installing Kali Linux on your computer.
Originally Kali Linux is Ubuntu-based, however, traces of Debian can also be found in it. The operating system comes with varieties of command lines, hacking tools towards information security tasks and numbers of day to day applications.
Kali Linux offers more than 600 penetration testing tools. It is completely free to use, supports a wide range of wireless devices and is also highly customizable.
How to Install Kali Linux on your computer?
Now, lets cut the chase and install it. Installing Kali Linux is a fairly easy and simple work to do. You have a number of installation options that normally depend on your choice.
- Installing it on your hard drive is the first option
- You can also perform the dual-booting where you can dual boot kali Linux with your current operating system
- Using virtualization software like VMware or Virtual box is another option
However, we are going to install it on your computer and perform a single boot. If you want a guide on virtualization purposes, comment down.
Note: Before starting the installation of Kali Linux on your computer, please have a back up of your data. As there is a chance that you might lose your data during the installation.
- Graphical Installation

As a first step, you will need to select ‘Graphical Install‘ on your screen and press Enter which will take you to the next step.
2. Choose Language

In this step, you will need to select the language of the operating system. Kali Linux support numbers of languages, so choose the one you want.
3. Select Location
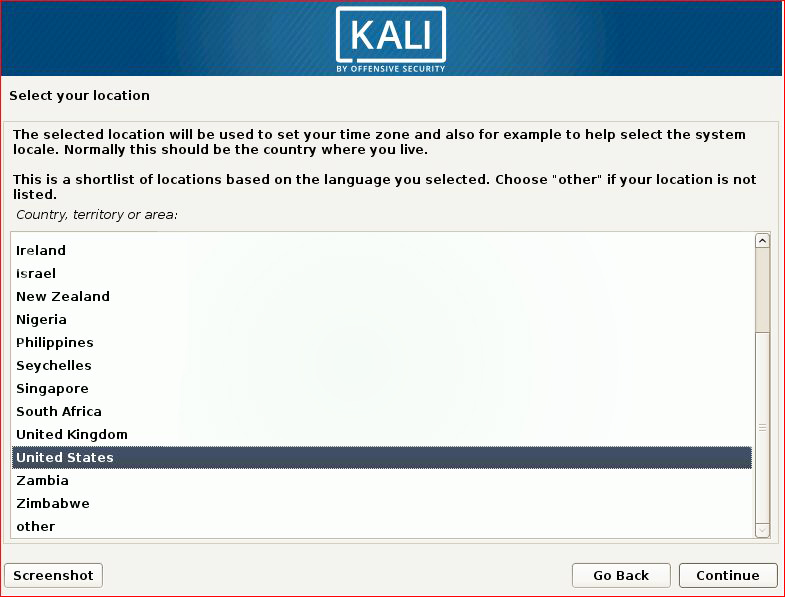
Choose region you are in and select the Continue key.
4. Configure Keyboard

Here you will need to select the keyboard language.
5. Network configuration

Before the domain name, the host will be asked there you can put “Kali” or something else, then you will be moved to the next step. You will be provided with a blank space asking for Domain name. If you are a home user then put something up as your own. It doesn’t need to be accurate or real. As now you have inserted the name click on Continue.
6. Set up passwords

This is the step where you create a password for your operating systems root. Insert the same password on both of the blanks. Remember that you should not let them blank, as it will put your system at risk.
7. Guided partition
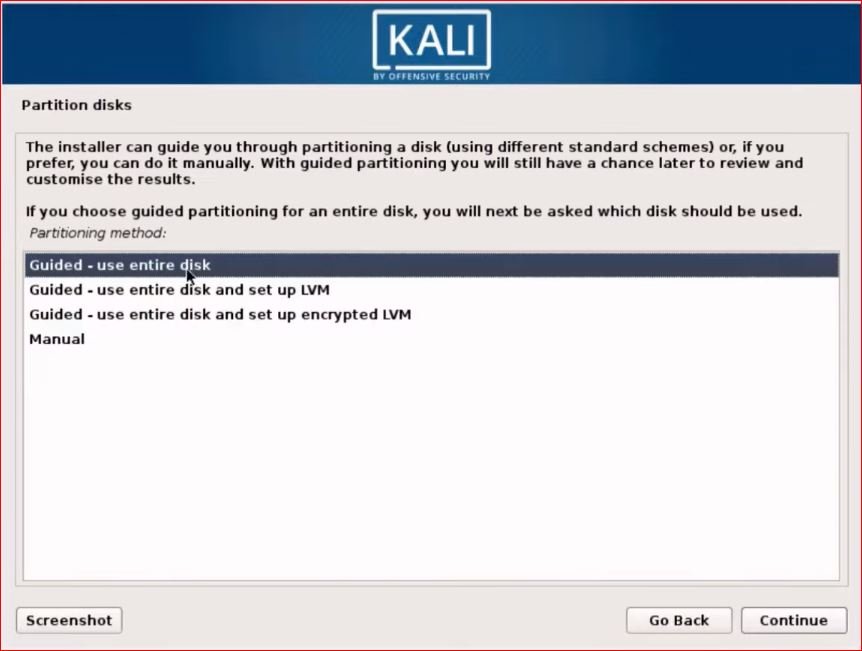
In the next step, a new window will appear. You will be asked about the partition type, click on the “Guided-use entire disk” option and click on the Continue button. Now, select “All the files in one partition (recommended for new users)” option and click on the Continue button.
8. Disk Partition
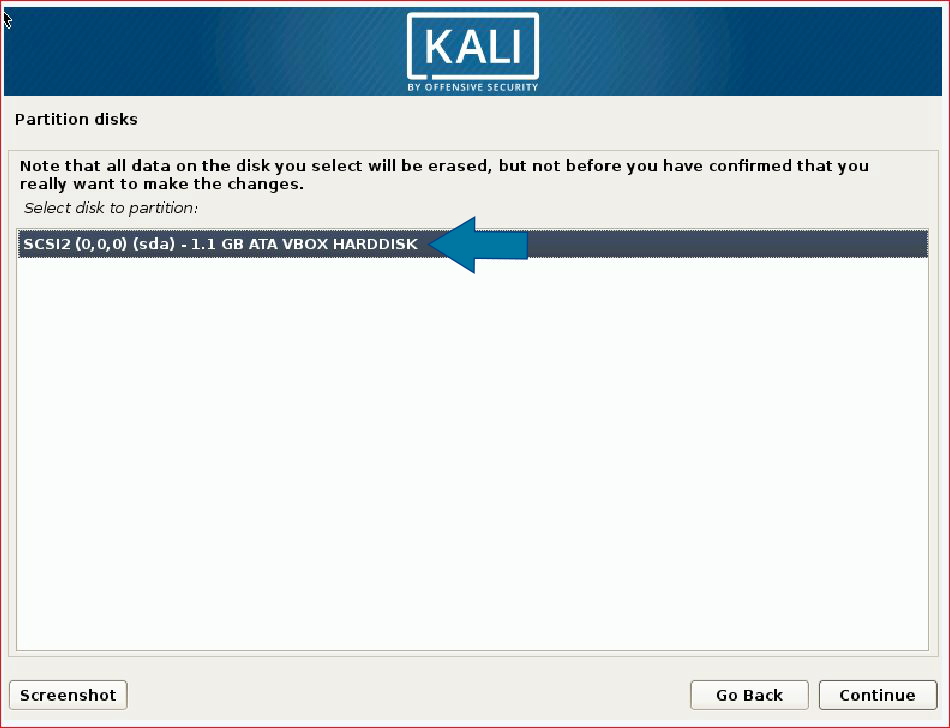
Select the disk you want to install the operating system in and click on Continue.
9. Finish Partition
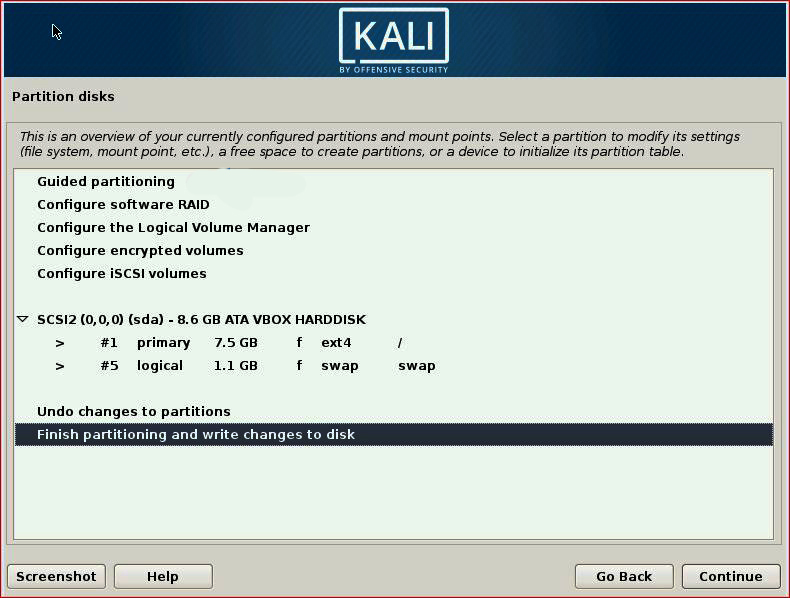
As, all the partitions are done. Select “Finish partitioning and write changes to disk” option and click on Continue button.
10. Changes to disk

Select Yes option and click on Continue.
11. Package Manager
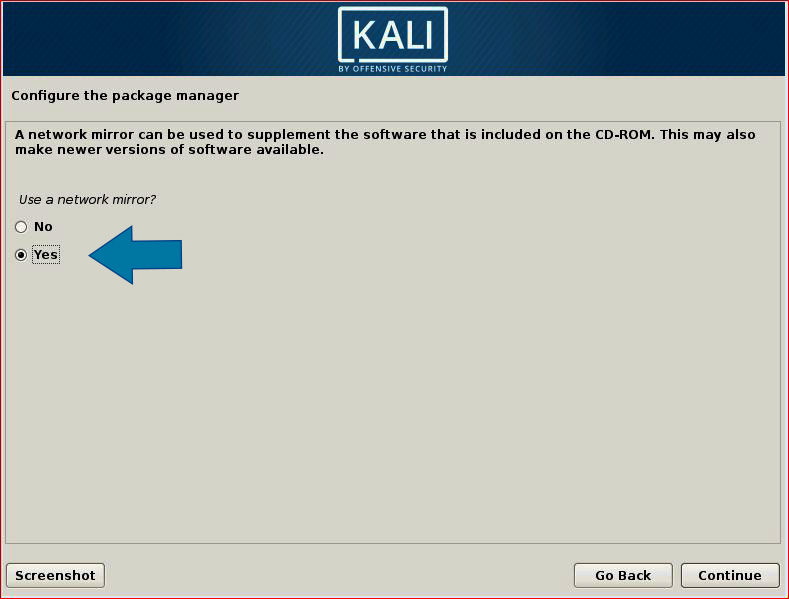
Choose the Yes option and select the Continue button. A configure package manager will appear asking for an HTTP proxy. Leave that blank, if need you can change it in the future.
12. GRUB boot loader
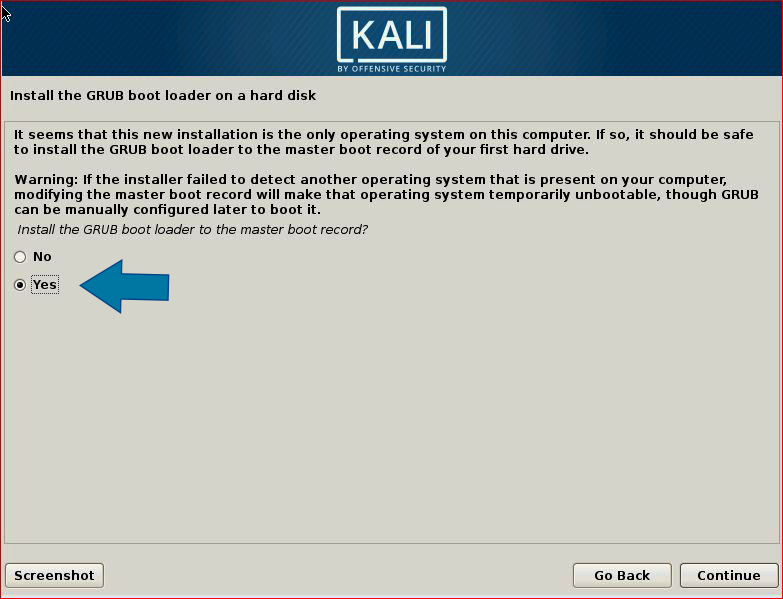
Install the GRUB Boot Loader by selecting Yes.
13. Grub boot loader on drive
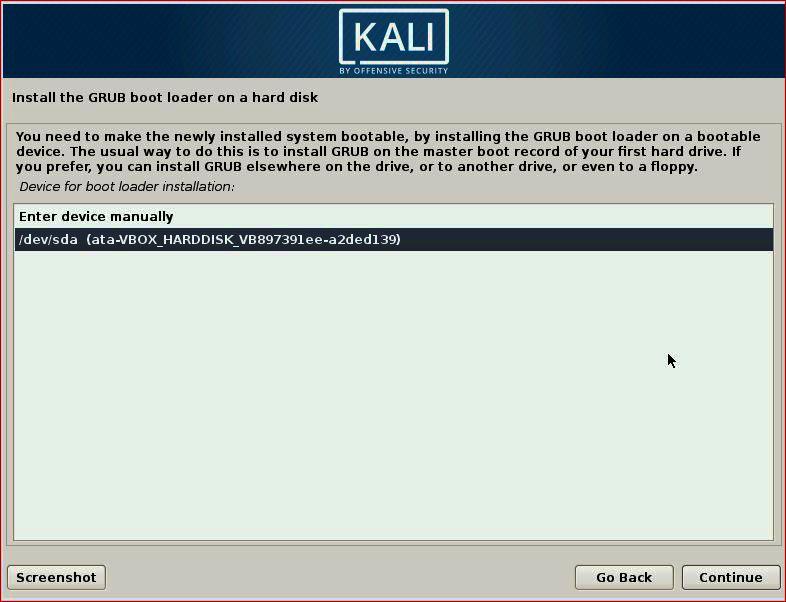
Here in this step, select the drive you want to install the Grub boot loader in. Choose the second option and Continue.
Few installations will be done, after a certain time, the operating system will be installed on your computer. A window will appear to Finish the installation, click on Continue button and you are ready to go.
Final thoughts
Installing Kali Linux is simple and easy. Most of the users get confused with HTTP proxy, domain or hostname. things like these can make them confused. As either, they are not aware of the terms. So, be patient with the installation and don’t freak out. If any step got wrong while installing Kali Linux, you can later change it from the settings or comment below.

